|
|
1.前言
咸鱼上有卖只能插座8.5一个,比较便宜就入手了
智能插座属于三无产品,公模外壳,app是丛云,应该已经停了
因此卖的便宜,也因此需要DIY软件,芯片是ESP8266
看了本帖,你可以学会如下技能:
-某智能插座的PIN定义
-如何Web配网和密钥
-如何Web OTA和Flash不足时OTA
-接入小爱同学
2.硬件介绍
公模外壳
三无产品
带一个按键
带安全门
PIN脚定义
正面
ESP8266+1MB
因此刷机时,按如下方式接线
插座 TTL板
Rx - Tx
Tx - Rx
Vcc - 3.3V
Gnd- Gnd
GPIO0-Gnd
3.软件介绍
3.1需要安装Arduino(略)
3.2需要安装Blinker(略)blinker-library-0.3.80210611
3.3需要安装依赖库
“工具”- “管理库”
WiFiManager;用于web配网
3.4代码(都是网上找的,大家将就着看吧)
继电器
Relay.ino
- #define BLINKER_WIFI
- #define BLINKER_MIOT_OUTLET
- #include <Blinker.h>
- #include <Ticker.h>
- #include <ESP8266WebServer.h>
- #include <ESP8266mDNS.h>
- #include <ESP8266HTTPUpdateServer.h>
- #include "Blwifi.h"
- const char* host = "SwitchUpdate";
- ESP8266WebServer httpServer(80);
- ESP8266HTTPUpdateServer httpUpdater;
- BlinkerButton BtRelay("btn-rly");
- #define BLUE_LED 15
- #define RED_LED 13
- Ticker ticker;
- uint8_t connFlag = 0;
- void BtRelay_callback(const String & state)
- {
- BLINKER_LOG("get button state: ", state);
- if(state=="on")
- {
- digitalWrite(RELAY_PIN, HIGH);
- BtRelay.text("on");
- BtRelay.color("#FFB90F");
- BtRelay.print("on");
- }
- else if(state=="off")
- {
- digitalWrite(RELAY_PIN, LOW);
- BtRelay.text("off");
- BtRelay.color("#DCDCDC");
- BtRelay.print("off");
- }
- else
- {
- if(digitalRead(RELAY_PIN))
- {
- digitalWrite(RELAY_PIN, LOW);
- BtRelay.text("on");
- BtRelay.color("#FFB90F");
- BtRelay.print("on");
- }
- else
- {
- digitalWrite(RELAY_PIN, HIGH);
- BtRelay.text("off");
- BtRelay.color("#DCDCDC");
- BtRelay.print("off");
- }
- }
- }
- void SetLed()
- {
- //if(connFlag == 1)
- {
- if(digitalRead(RELAY_PIN))
- {
- digitalWrite(BLUE_LED, HIGH);
- digitalWrite(RED_LED, LOW);
- }
- else
- {
- digitalWrite(BLUE_LED, LOW);
- digitalWrite(RED_LED, HIGH);
- }
- }
- }
- void tickerCount()
- {
- if(connFlag == 0)
- digitalWrite(BLUE_LED, !digitalRead(BLUE_LED));
- }
- void dataRead(const String & data)
- {
- BLINKER_LOG("Blinker readString: ", data);
- Blinker.vibrate();
-
- uint32_t BlinkerTime = millis();
-
- Blinker.print("millis", BlinkerTime);
- }
- void heartbeat()
- {
- if(digitalRead(RELAY_PIN))
- {
- BtRelay.text("on");
- BtRelay.color("#FFB90F");
- BtRelay.print("on");
- }
- else
- {
- BtRelay.text("off");
- BtRelay.color("#DCDCDC");
- BtRelay.print("off");
- }
- }
- void miotPowerState(const String & state)
- {
- BLINKER_LOG("need set power state: ", state);
- if (state == BLINKER_CMD_ON)
- {
- digitalWrite(RELAY_PIN, HIGH);
- BlinkerMIOT.powerState("on");
- BlinkerMIOT.print();
- }
- else if (state == BLINKER_CMD_OFF)
- {
- digitalWrite(RELAY_PIN, LOW);
- BlinkerMIOT.powerState("off");
- BlinkerMIOT.print();
- }
- }
- void miotQuery(int32_t queryCode)
- {
- BLINKER_LOG("MIOT Query codes: ", queryCode);
- switch (queryCode)
- {
- case BLINKER_CMD_QUERY_ALL_NUMBER :
- BLINKER_LOG("MIOT Query All");
- BlinkerMIOT.powerState(digitalRead(RELAY_PIN) ? "on" : "off");
- BlinkerMIOT.print();
- break;
- case BLINKER_CMD_QUERY_POWERSTATE_NUMBER :
- BLINKER_LOG("MIOT Query Power State");
- BlinkerMIOT.powerState(digitalRead(RELAY_PIN) ? "on" : "off");
- BlinkerMIOT.print();
- break;
- default :
- BlinkerMIOT.powerState(digitalRead(RELAY_PIN) ? "on" : "off");
- BlinkerMIOT.print();
- break;
- }
- }
- void setup()
- {
- Serial.begin(115200);
- BLINKER_DEBUG.stream(Serial);
- connFlag = 0;
- ticker.attach(1, tickerCount);
-
- Blwifi_InitWiFi();
-
- Blinker.begin(wifiSettings.auth_key, wifiSettings.ssid, wifiSettings.pswd);
- Blinker.attachData(dataRead);
- Blinker.attachHeartbeat(heartbeat);
- BlinkerMIOT.attachPowerState(miotPowerState);
- BlinkerMIOT.attachQuery(miotQuery);
-
- BtRelay.attach(BtRelay_callback);
- pinMode(RELAY_PIN, OUTPUT);
- digitalWrite(RELAY_PIN, HIGH);
- pinMode(BLUE_LED, OUTPUT);
- pinMode(RED_LED, OUTPUT);
- digitalWrite(RED_LED, LOW);
- MDNS.begin(host);
- httpUpdater.setup(&httpServer);
- httpServer.begin();
- MDNS.addService("http", "tcp", 80);
- connFlag = 1;
- }
- void loop()
- {
- Blinker.run();
- Blwifi_Loop();
- httpServer.handleClient();
- SetLed();
- }
引用的文件
Blwifi.cpp
- #include <WiFiManager.h>
- #include <EEPROM.h>
- #include "GpioButton.h"
- #include "Blwifi.h"
- WiFiManager wifiManager;
- void ResetWifi()
- {
- ClearWiFiInfo();
- wifiManager.resetSettings();
- ESP.restart();
- }
- void mbt_press_callback()
- {
- #ifdef SUPPORT_DEBUG
- Serial.println("<Event>Click");
- #endif
- if(digitalRead(RELAY_PIN))
- {
- digitalWrite(RELAY_PIN, LOW);
- }
- else
- {
- digitalWrite(RELAY_PIN, HIGH);
- }
- }
- void mbt_long_press_callback()
- {
- #ifdef SUPPORT_DEBUG
- Serial.println("<Event>Long Press Tick");
- Serial.println(F("WiFi resetSettings."));
- #endif
- for(int i=0;i<3;i++)
- {
- digitalWrite(LED_IO, LOW);
- delay(100);
- digitalWrite(LED_IO, HIGH);
- delay(400);
- }
- ResetWifi();
- }
- // 定义按钮对象,指定按钮的GPIO口
- GpioButton myButton(RESET_WIFI_PIN);
- bool shouldSaveConfig=false;
- Settings wifiSettings;
- void saveConfigCallback()
- {
- #ifdef SUPPORT_DEBUG
- Serial.println("Should save config");
- #endif
- shouldSaveConfig = true;
- }
- bool chkAuthkey(char* key, int len)
- {
- if (len != 12) return false;
- for (int i=0;key[i]!=0;i++){
- if (!isxdigit(key[i])) return false;
- }
- return true;
- }
- void ClearWiFiInfo()
- {
- EEPROM.begin(1280);
- EEPROM.get<Settings>(1024, wifiSettings);
- wifiSettings.auth_key[0]='\0';
- EEPROM.put<Settings>(1024, wifiSettings);
- if (EEPROM.commit())
- {
- #ifdef SUPPORT_DEBUG
- Serial.println(F("EEPROM successfully committed"));
- #endif
- }
- else
- {
- #ifdef SUPPORT_DEBUG
- Serial.println(F("ERROR! EEPROM commit failed"));
- #endif
- }
- EEPROM.end();
- }
- void Blwifi_InitWiFi()
- {
- myButton.bindEventOnClick(mbt_press_callback);
- myButton.bindEventOnLongPress(mbt_long_press_callback);
- EEPROM.begin(1280);
- EEPROM.get<Settings>(1024, wifiSettings);
- if( wifiSettings.auth_key[0]=='\0'||wifiSettings.auth_key[0]==0xFF)
- {
- WiFi.mode(WIFI_STA);
- //wifiManager.setDebugOutput(true);
-
- wifiManager.resetSettings();
- wifiManager.setAPStaticIPConfig(IPAddress(192,168,10,1), IPAddress(192,168,10,1), IPAddress(255, 255, 255, 0));
- // 3分钟配网时间,如没有完成则退出配网.
- // 例如原正常连接的WIFI路由掉线死机或不通电等情况, 通过配网超时后, 会重新进行连接原WIFI信号。 避免停在配网模式下等待
- wifiManager.setConfigPortalTimeout(180);
- //wifiManager.setConnectTimeout(240);
- // 设置点击保存的回调
- wifiManager.setSaveConfigCallback(saveConfigCallback);
- WiFiManagerParameter custom_authkey("auth_key", "Authkey", wifiSettings.auth_key, 12);
- wifiManager.addParameter(&custom_authkey);
- //AP名称:ESP_AP 密码:12345678
- if(!wifiManager.autoConnect("ESP_AP","12345678"))
- {
- #ifdef SUPPORT_DEBUG
- Serial.println(F("Failed to connect. Reset and try again. . ."));
- #endif
- ResetWifi();
- delay(5000);
- }
- #ifdef SUPPORT_DEBUG
- Serial.println(F("Connected to Wifi."));
- Serial.print(F("My IP:"));
- Serial.println(WiFi.localIP());
- #endif
- // 保存自定义信息
- if (shouldSaveConfig)
- {
- #ifdef SUPPORT_DEBUG
- Serial.println(F("saving config..."));
- #endif
- //Serial.println(custom_authkey.getValue());
- strncpy(wifiSettings.auth_key, custom_authkey.getValue(), 12);
- wifiSettings.auth_key[12] = '\0';
- strcpy(wifiSettings.ssid, wifiManager.getWiFiSSID().c_str());
- wifiSettings.ssid[wifiManager.getWiFiSSID().length()]='\0';
-
- strcpy(wifiSettings.pswd, wifiManager.getWiFiPass().c_str());
- wifiSettings.pswd[wifiManager.getWiFiPass().length()]='\0';
-
- if (!chkAuthkey(wifiSettings.auth_key, strlen(wifiSettings.auth_key)))
- {
- #ifdef SUPPORT_DEBUG
- Serial.println(F("Authkey is wrong."));
- #endif
- ResetWifi();
- delay(5000);
- }
- EEPROM.put<Settings>(1024, wifiSettings);
- if (EEPROM.commit())
- {
- #ifdef SUPPORT_DEBUG
- Serial.println(F("EEPROM successfully committed"));
- #endif
- }
- else
- {
- #ifdef SUPPORT_DEBUG
- Serial.println(F("ERROR! EEPROM commit failed"));
- #endif
- }
- ESP.restart();
- }
- }
- EEPROM.end();
- wifiSettings.auth_key[12] = '\0';
- }
- void Blwifi_Loop()
- {
- myButton.loop();
- }
Blwifi.h
- #ifndef __BLWIFI_H__
- #define __BLWIFI_H__
- //#define SUPPORT_DEBUG
- #define RESET_WIFI_PIN 12
- #define RELAY_PIN 4
- #define LED_IO 15
- struct Settings
- {
- char auth_key[13];
- char ssid[128];
- char pswd[32];
- };
- extern Settings wifiSettings;
- void Blwifi_InitWiFi();
- void ClearWiFiInfo();
- void Blwifi_Loop();
- #endif
这个应该是本论坛找的GpioButton.h
4. 使用方法
4.1刷写程序(略)
4.2配网
上电后创建“ESP_AP”热点,手机后自动弹出HTML配网页面,或者输入192.168.10.1
输入SSID,密码和密钥;点击Save即可,如下图
界面配置如下
- {¨version¨¨2.0.0¨¨config¨{¨headerColor¨¨transparent¨¨headerStyle¨¨dark¨¨background¨{¨img¨¨assets/img/headerbg.jpg¨¨isFull¨«}}¨dashboard¨|{¨type¨¨btn¨¨ico¨¨fad fa-power-off¨¨mode¨Ê¨t0¨´关´¨t1¨¨文本2¨¨bg¨É¨cols¨Í¨rows¨Í¨key¨¨btn-rly¨´x´Ë´y´Ï¨speech¨|÷¨clr¨¨#076EEF¨¨lstyle¨Ë}÷¨actions¨|÷¨triggers¨|÷}
4.3 重置WiFi
长按按键3s,即可清除密码,重新配网
4.4 Web OTA
配网之后,正常运行时,在IE(推荐)浏览器中输入IP/Update,即可打开升级页面
注意,不知道IP的话去路由器中查看
点击“浏览”选择生成的bin文件
点击Update Firmware进行升级,升级成功有提示
4.5 内存不够升级失败
用中转的方式解决
先刷入较小的支持OTA的固件,仅300多KB,然后再刷入正常的OTA固件
OTA代码
- /**
- /*
- To upload through terminal you can use: curl -F "image=@firmware.bin" esp8266-webupdate.local/update
- */
- #include <ESP8266WebServer.h>
- #include <ESP8266mDNS.h>
- #include <ESP8266HTTPUpdateServer.h>
- #include <Ticker.h>
- const char* host = "SwitchUpdate";
- ESP8266WebServer httpServer(80);
- ESP8266HTTPUpdateServer httpUpdater;
- Ticker ticker;
- #define BLUE_LED 15
- #define RED_LED 13
- void tickerCount()
- {
- digitalWrite(RED_LED, !digitalRead(RED_LED));
- }
- void setup(void)
- {
- uint32_t wait = millis()+10*1000;
- while(WiFi.waitForConnectResult() != WL_CONNECTED)
- {
- if(wait < millis())
- ESP.restart();
- }
- MDNS.begin(host);
- httpUpdater.setup(&httpServer);
- httpServer.begin();
- MDNS.addService("http", "tcp", 80);
- pinMode(RED_LED, OUTPUT);
- pinMode(BLUE_LED, OUTPUT);
- digitalWrite(BLUE_LED, HIGH);
- ticker.attach(1, tickerCount);
- }
- void loop(void)
- {
- httpServer.handleClient();
- }
5.注意事项
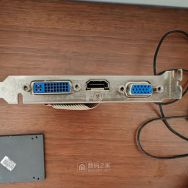
硬件分为2M和1M版本
下图是2MB版本
需要根据Flash大小来配置,否则刷进去不启动,原因不明
2MB版本可以直接OTA,不需要通过较小的OTA转
6.其他
以上全部内容打包到附件中,包括BIN文件
|
本帖子中包含更多资源
您需要 登录 才可以下载或查看,没有账号?立即注册


x
打赏
-
查看全部打赏
|

 [复制链接]


 IP归属地
IP归属地 雷达卡
雷达卡 发表于 2021-8-14 10:28:13
 提帖卡
提帖卡 置顶卡
置顶卡 锁帖卡
锁帖卡 解锁卡
解锁卡 显目卡
显目卡 千斤顶
千斤顶 发表于 2021-8-14 15:42:44
 楼主
楼主